If you are interested in purchasing Thinkific, it is useful to first take a look at all the functions and the advantages and disadvantages. This way you know whether this course software does what you need.
I have tested it and have listed everything below.
Thinkific course software
Thinkific is a training platform, an LMS. By paying a monthly fee (there is also a free version, more about that later) you can put your course online so that it is available to your customers.
One of the founders once needed such software for his own online course. When more and more people asked if they could also use it, Thinkific was born. So it’s software from a maker for a maker.
Thinkific has a modern, fresh look that makes it very appealing for many people. Both for makers and participants. There are already 50,000+ course developers using the system.
Review Thikific
With Thinkific you can put your course online, receive payments and adjust the layout of the course website. You can receive credit card payments (in lots of valuta) via Stripe and dollars via Paypal.
Thinkific works very well for the course creator, is very user-friendly, and is well-arranged. The course environment is also very clear for a student without too much distraction.
The backend (for management) is in English, but the part that a student sees can be put in more than 40 languages.
What is unique about Thinkific and what most other software doesn’t have is a free version. I don’t mean the 30-day free trial of the Pro version, but a permanently free version with which you can put your course online. You may have fewer functions, but it just works well and you can get started right away without it having to cost you money.
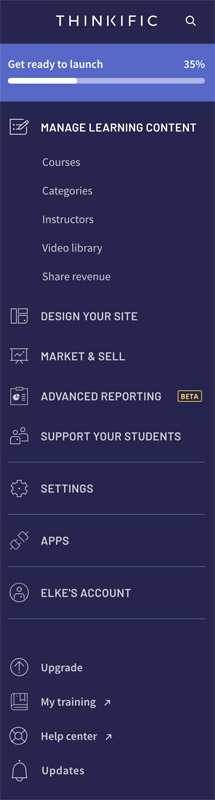
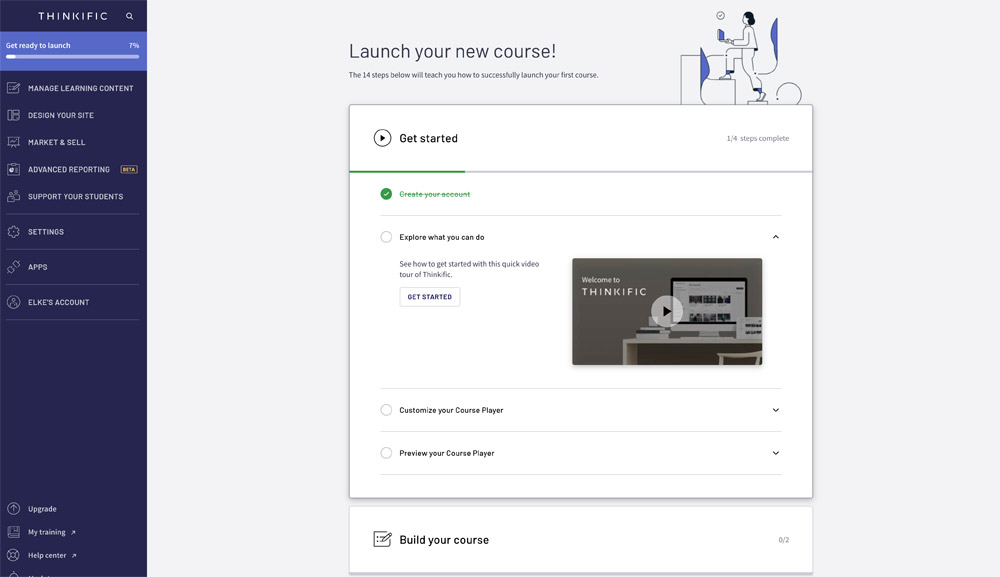
As soon as you have created an account, you will immediately see a screen with all the steps you can follow to launch your first course. You can watch a few videos with info, personalize your course environment, create the content of your course, …
If you are new to creating a course, it is useful that you can follow these steps. However, it is not necessary because the menu is also very clear and I am sure that you will quickly find your way through it.
Features of Thinkific
Depending on which Thinkific plan you purchase (see prices below), you have more or fewer options. With a pro plan, you can enjoy more functions than the basic or the free version. But even with the free version you can do a lot.
Put your course online
You purchase Thinkific to put your course online, so we will look at that first. You don’t need any technical knowledge at all because it is very easy to create and publish your course.
After you create a course you can create multiple chapters. These are the modules of your course. This allows you to structure your course so that you have a clear step-by-step plan.
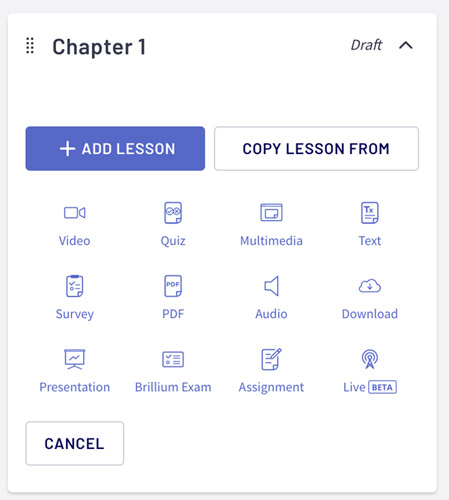
You can then provide multiple lessons within a chapter. Creating a lesson is very easy. To do this, click on “add lesson” and then you can choose which type of lesson you want to create. This can simply be a text or video lesson, but you can also opt for a quiz, multimedia, survey, PDF, audio, download, presentation, brillium exam, assignment or go live.
video lesson
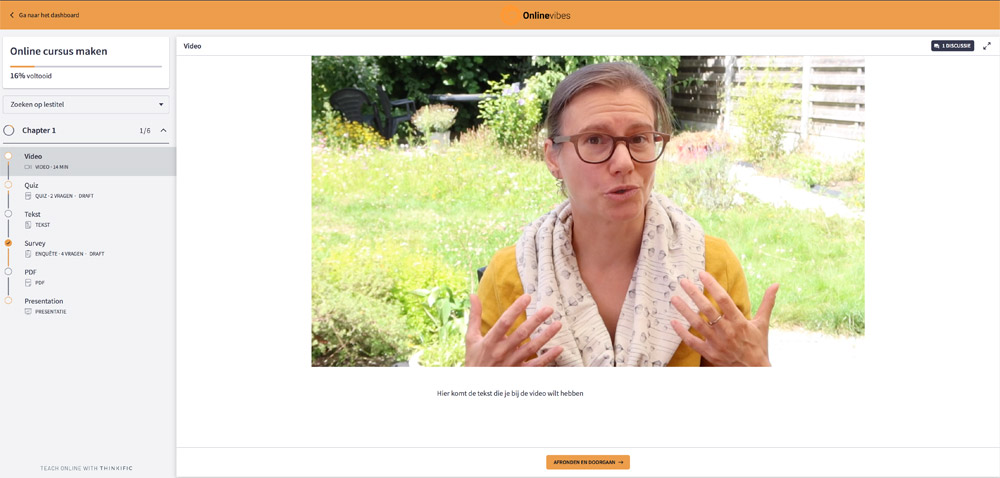
Most course creators make video lessons so let me start with that. In the video library, you can upload videos or you can do so directly with a lesson. In addition to the video, you can also add text, which is useful for a student if it is offered as both text and video.
You can set whether the videos should start playing automatically or not and in the library you can also view the statistics of the video. This way you can see which video has been viewed a lot and whether it has been played completely or only a small part.
Quizzes and Surveys
You can ask the participants questions. With a survey, you will find out more about how you can improve your products and services. In addition to an open question or multiple choice question, you can also have a rating given or determine what they think on a scale.
With a quiz, you can test the knowledge and see if they have correctly understood what they have just learned. These are limited to multiple-choice questions. What you can do is create a multimedia lesson and refer it to an external tool, you can also opt for Brillium exam but you have to purchase this tool separately.
Presentations and meetings
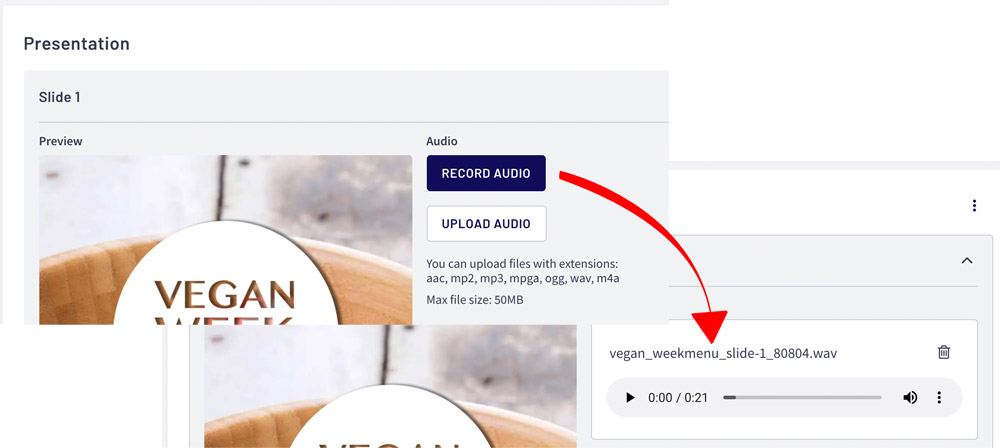
You can give a presentation by uploading a PDF file. This is automatically converted into separate slides. And what I really like about it is that you can then upload an audio file or record audio directly. This way you can tell a story with every slide.
When a student views the slides, the audio starts playing immediately. They can click on next and previous to navigate through the slides.
If you prefer to give live meetings, you can do that with a Pro account. Then you have the integration with Zoom. If you also provide coaching with your course, that is useful. You can then give a webinar or a Zoom meeting.
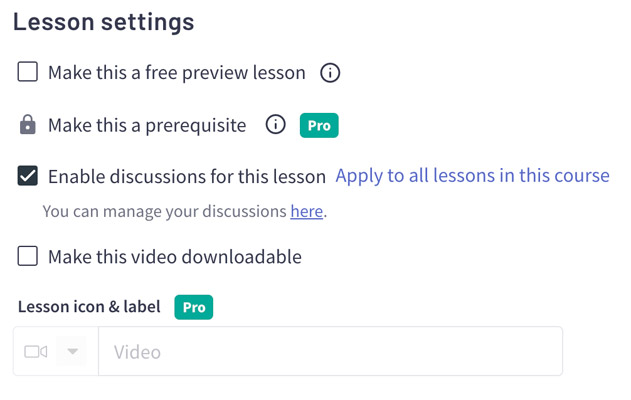
Lesson Settings
For each lesson, you can optionally make it available as a free preview lesson. You can activate discussions per lesson or for all lessons within this course. Discussions allow participants to comment on each lesson. This is slightly different from the community that we will come back to later. You can also indicate that this lesson must be a requirement to continue to the next lesson.
There are also settings that depend on the type of lesson you have chosen. With a video lesson, you can make the video downloadable and with PDF you can have the PDF downloaded. With a quiz you can indicate the minimum you have to achieve to pass or you can have the questions come in a random order (so that people can’t cheat).
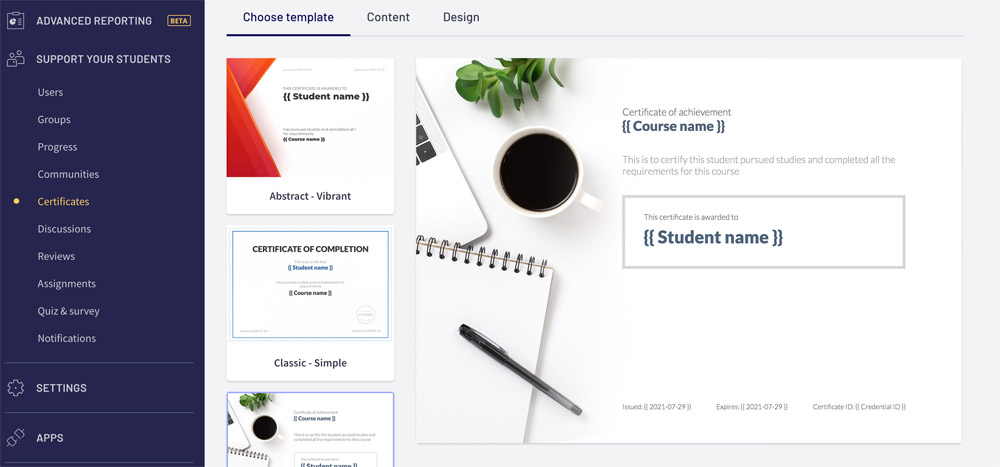
Course Settings
You can also adjust settings for the entire course. Of course, you can add an image and a piece of text, but you can also make the course private or hidden. If you have chosen a certificate under “Certificates”, you can add it to the course. For example, after completing the course, you can receive the certificate with their name and the course they have followed.
If you don’t want the entire course to be made available in one go, you can set up content dripping. This way you can give a student access to a new module every week. You can choose to do that on a specific day if, for example, you all start with a group on the same date and you may even have live meetings. If everyone can start whenever they want, you can set the content dripping to start on the date that someone is registered or the date that they actually started the course.
With most other platforms content dripping is usually from the registration date. So it is useful here that you can also set it up when someone actually starts the course.
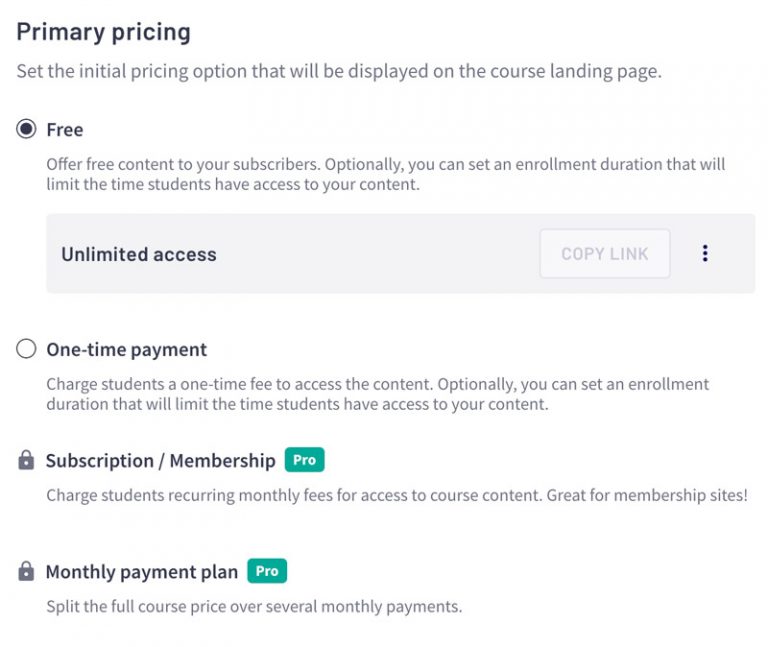
Setting the price
There are 4 ways to set the price. For example, you can offer the course for free, ask for a one-time fee, offer it as a membership (with monthly payments), or with a more expensive course, you can also offer a payment plan.
You can make the course available for life or have it accessible for a certain period of time.
Website design
You can edit the look of the website on which customers and potential customers end up. This really concerns the course environment, so the pages on which the course can be purchased, the account, the homepage, … You can also add extra pages if you want, but you can’t create a blog with them.
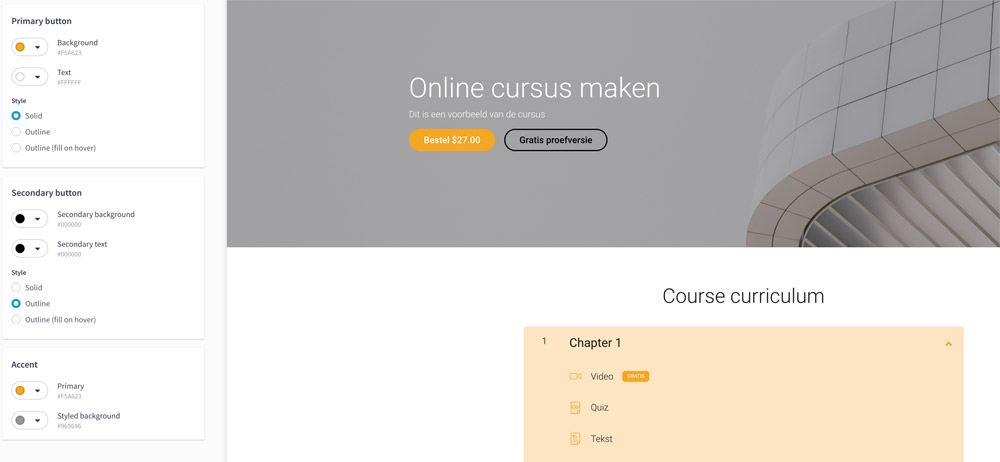
The standard design of your Thinkific website looks fresh and minimalistic. You can choose from a few other themes (in the theme library) in terms of layout, which are all very clean and modern.
On such a page that you are going to edit or one that you are creating, you can easily add new content. By clicking on the plus sign you can choose a section. Such a section is a layout block with, for example, an image, piece of text, and a button, or a testimonial, countdown, video, …

If you have added such a section, you can adjust its content and layout. You can also edit the header and footer in this way. This way you can add links to newly created pages.
Recieve payments
How does the built-in payment system work? You have the choice to use Stripe or Paypal. If you set up Paypal you can only receive dollars but with Stripe, you can choose the currency. You can create a Stripe account and connect it via Thinkific. After that, you can receive payments via credit card.
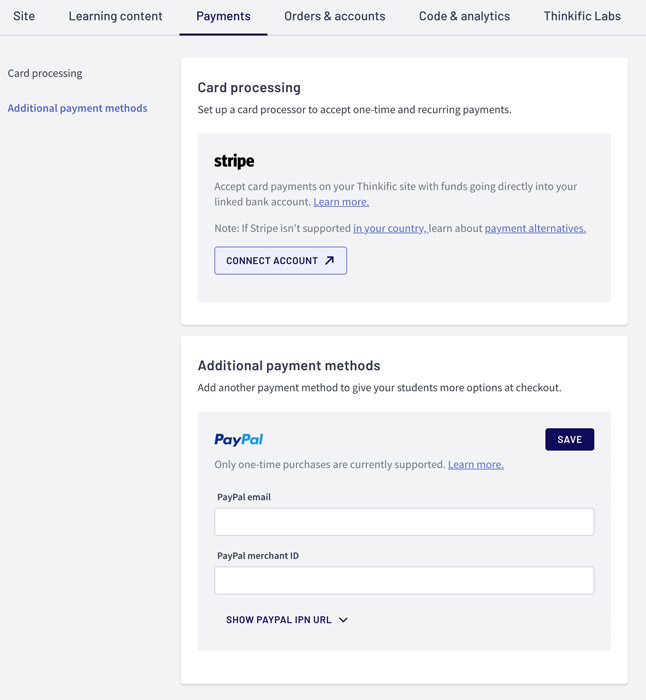
By the way, you can also bundle several courses and sell them together or work with a membership where you’re customers pay monthly to get access.
If you choose not to work with the integrated payment system but choose a separate payment solution, you can still use the Thinkific sales pages. You then use buttons that link to the URL of your payment page. Do you already have a website and would you rather use a sales page there, that is of course also possible.
Working with affiliates
Thinkific has standard the option to work with affiliates. You can change the role of a user to affiliate and grant this person a certain commission on sales. In the dropdown menu at their account picture, they can go to the affiliate section to use their personal links.
Community
If you want your own social media, you can opt for the Pro package with which you can create one community. If you want more than one, you can buy the Growth package. Especially when you work with a membership, a community can be very useful. Members can create their own posts, share photos and links. You can make this Thinkific community available to all logged-in students or only to those who have purchased a course.
Thinkific app store
Most other course platforms call it integrations, but Thinkific has a real Thinkific app store. You can activate these apps if you want to use them. Keep in mind that you can’t just use all apps. For some, you need a Pro account, but for others, you can also use it with a free account.
Thinkific prices
Free version
As I mentioned, Thinkific is one of the few that has a completely free version. You can use this permanently for free and you can put a complete course online with it. Obviously, you don’t have access to all functions, but maybe this free version is enough for you. Or you can start with this and as soon as you get more participants for your courses, you can upgrade to get more options.
Basic
With the basic account, you can add unlimited courses and students. You can send each student an e-mail separately, but not all at the same time (which is possible with the extra growth package). You can use your email marketing software for that as there is an integration with AWeber, Convertkit, Constant Contact, and Mailchimp, or you can use the Zapier link. In terms of marketing, you can work with discount codes and affiliates.
The basic version costs $49 per month or $39 per month if you pay annually.
Pro
A Pro account is most suitable for most course creators. You can not only sell a course separately but also make course bundles or work with memberships. When a student has completed the course, you can provide a certificate. You don’t have to create a separate Facebook group, but you can set up a community within Thinkific. For example, customers who follow a course and want to ask or share something do not have to leave but can stay in your Thinkific environment. And if you would like to give live Zoom sessions, the Pro account is definitely for you.
The Pro version costs $99 per month or $79 per month if you pay annually.
Growth Package
The growth plan is an extension of the Pro plan for which you also pay a monthly amount. Above 100 students you pay per extra student, so your package grows with it. You can remove the Thinkific logo from your course environment, you can create groups, work with webhooks and you have extra integration options with Zapier, ActiveCampaign,… and you can add or remove students in bulk.
Premier
Premier is more suitable for the somewhat larger companies. You then have 5 website admins and even 50 course admins. You also get 30 minutes of telephone contact so you can start properly and as soon as you want to launch they check everything again to see if everything is in order.
The Premier version costs $499 per month or $399 per month if you pay annually.
Thinkific Plus
Thinkific plus is for very large companies. For example, Intel, Hootsuite, Samsung, and Shopify use this. You will be assigned a dedicated customer success manager to whom you can go with all your questions. You are also no longer limited in the number of accounts to manage your course environment and you have even more integration and personalization options.
How does Thinkific work?
You can start by creating a free account. To do this, enter your name and e-mail address and choose a password. In the next step, you have to fill in some questions such as whether you already have experience with online courses and whether your training is ready, or whether you have not started yet.
After that, your own school is live and you will see which 14 steps you can follow to get your site live.
- create an account
- Start watching video
- Personalize your course environment
- Preview your course environment
- Add content to your course
- View your course
- Personalize your landing page
- Personalize your home page
- Name your site
- Personalize the URL
- Correct the payment settings
- Rate your course
- Personalize the course card
- Publish the course
You don’t have to follow these steps, but it’s a handy guideline if you’re just getting started with Thinkific.
The best thing to do first is to go to your mailbox. In it is a verification email from Thinkific to confirm that your email address is correct. If you do this after you have already changed the name of the school, the URL in the email will no longer be correct.
By default, your e-learning environment is called “your name school”, but you can adjust that (at settings) to, for example, your company name. You can also choose a primary color, upload a logo, set language.
You can first create all modules and lessons and then your sales page.
A customer can log in to your course website and see all courses on his dashboard that he has access to or can view all courses to possibly purchase an extra one. If you have created a community (from Pro plan) they can talk to each other there.
Thinkific review conclusion
Thinkific is very user-friendly software with a modern, clean look that works very easily for both a creator and a participant. You can use the built-in payment system and design the website without knowing to code. You can then opt for an external solution. You can use the software for individual courses as well as for a paid membership. There’s even the option to use Thinkific for free (with more limited features).
Are there still things that are not clear, are you in doubt about other software? Please contact me and I will look at you to see what is suitable for you.