In this Aweber review, we look at what Aweber is, what functions it has and whether it is user-friendly. This way you can determine whether this software is suitable for you or whether you should choose another one?
What is Aweber?
Aweber is an email marketing software and service that helps people grow their businesses. The software makes it easy to create email marketing campaigns and gives subscribers the ability to manage their subscriptions using a web-based control panel.
With Aweber, you have email marketing tools such as autoresponders, list management, and analytics, as well as features for creating landing pages, pop-up forms, signup forms, and more.
Aweber is best for: small businesses, entrepreneurs, bloggers, and solopreneurs looking for an affordable option to send newsletters, promote events and grow their lists.
Usability
It is clear how Aweber works, and you are also shown the way through the system. Often a part also contains links to the Aweber website for more information about that part or an explanation of how to use it. Still, there is other software such as Mailerlite that I would give a higher score in terms of user-friendliness.
Features of Aweber
Send emails
Probably the most important thing you’ll want to use Aweber for: sending emails.
There are several ways you can do that:
If you want to send regular emails to your list (e.g. your weekly newsletter), then choose broadcast. To create this email, you can choose from drag&drop email builder, plain text message, or HTML editor.
With the drag&drop editor, a piece of text is available by default. Such a simple email works best as it is less seen as a “newsletter”.
If you would like a designed e-mail, that is possible. You can start from a template that you have saved yourself or from one of the many ready templates in Aweber. Each of these templates is available in a few color combinations.
The ready-made templates are divided into several categories: corporate, blog, recreation, vacation, home, food, WordPress, general, promotion, consulting, retail, celebration, real estate, travel, cars.
Via the drag&drop builder, you can drag all kinds of elements onto the email to shape your email:
- Headline
- Paragraph
- Article (photo, title, text and button)
- Image
- Video
- Button
- Social
- Product (create yourself or link with Etsy shop)
- Coupon
- Logo
- Signature
- Divider
- Share
- Row
- Carousel
- Feed
If you want to send formatted e-mails, a nice design is great. Many people use Canva for this. Within Aweber, you can start using Canva without leaving Aweber. This can also be done on a landing page.

After the email has been created and tested, you can schedule it for sending. Here you indicate which list and which segment should receive the e-mail. You can send the email immediately or choose a date and time.
Split testing
If you have a Pro account, you can split-test your e-mails so that you can see which e-mail works best.
Autoresponder
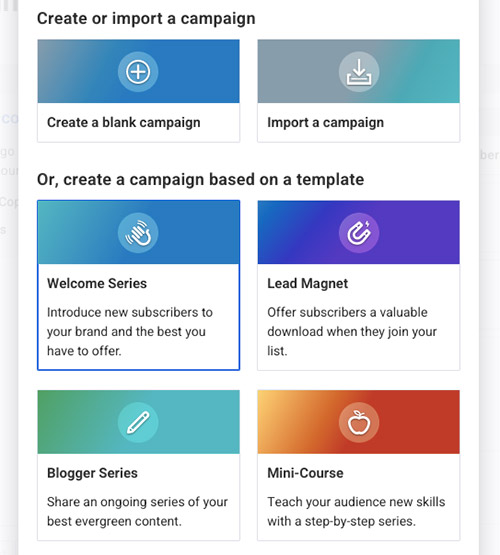
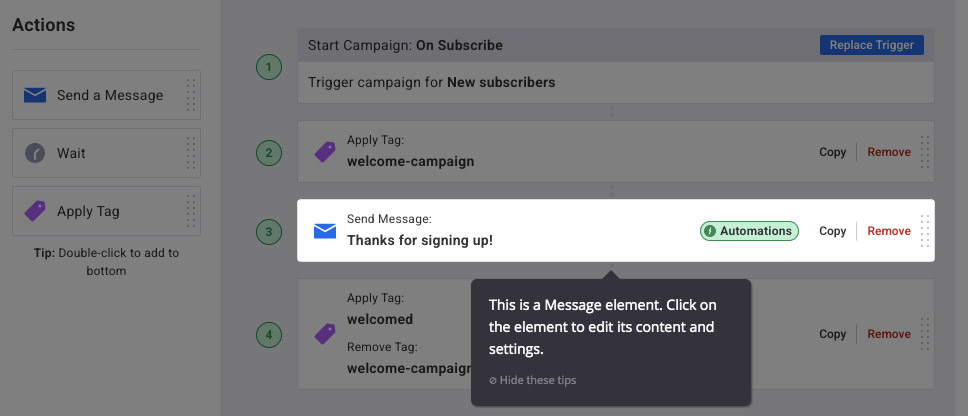
If you want to create an automation, you can do so via “Campaigns”. You can start blank or start from a template. By default, there are four ready: welcome emails, lead magnet, blogger series, and mini-course. You can find a few more on the marketplace.
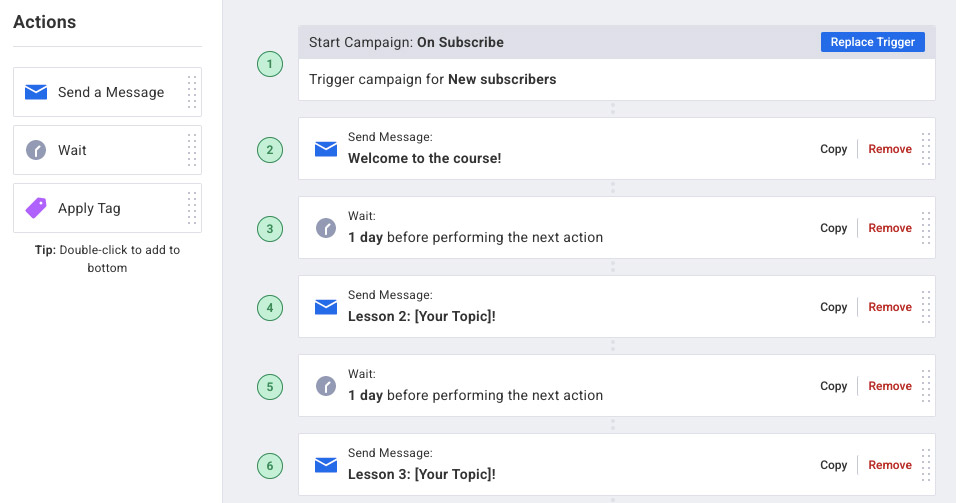
To customize the automation, you can add 3 types of actions: an email, wait a period, add or remove a tag. You can set the waiting time in minutes, hours, days, weeks, or months. You can configure when someone opens the e-mail or clicks on the link in the e-mail, a certain tag is given, or the person is removed from this campaign.
An automation can start as soon as someone subscribes to your list or when someone is assigned a certain tag.
Blog broadcast
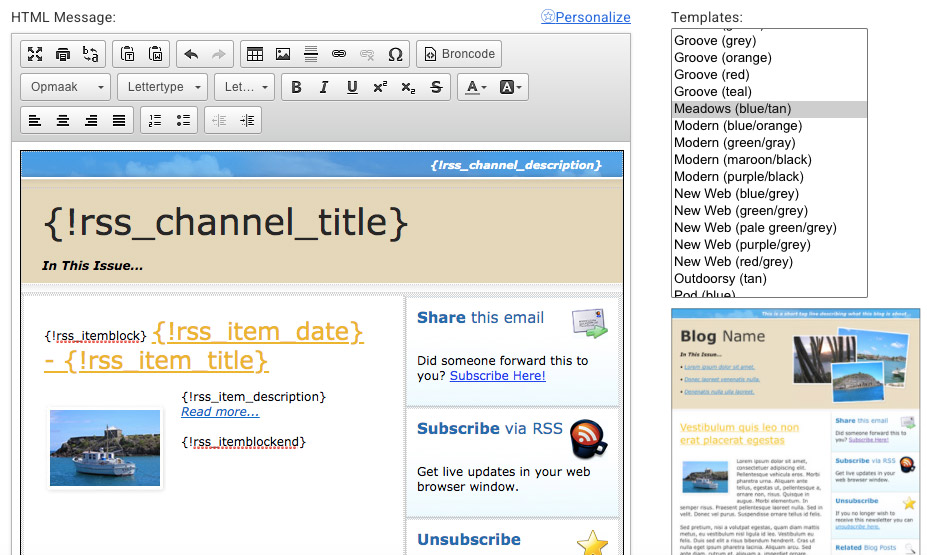
With the blog broadcast, you can send emails containing your new blog posts. This is possible with RSS. You can send the email immediately or at a fixed time.
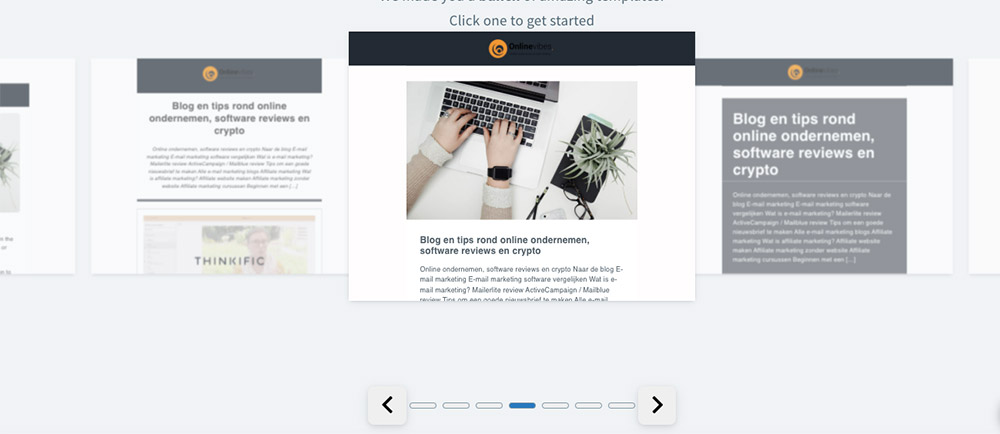
You choose from one of the different templates. In terms of design, they do not look so fresh and modern. You can still adjust it if you want.
Templates
You can use the smart designer. Here you can enter the URL of your site, and based on that, several templates will be created from which you can choose.
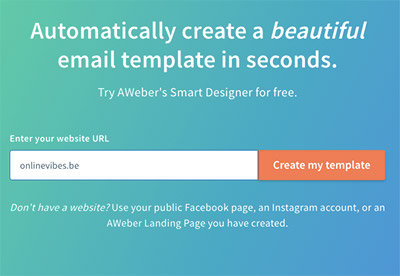
Once you have chosen one, you can adjust the template. This is a very nice way if you like to use a designed template to create it. It is quickly ready, and you immediately have your brand colors and logo on it.
Contacts
You can find all your contacts under “Subscribers”.
You can manually add contacts one by one or several simultaneously by uploading a CSV, txt, or xls. Or you can paste all contacts together in one field.
Usually, you will not upload a contact manually, but they will register themselves via a form.
If you want to create a form, you first choose whether you want it on the landing page of Aweber or whether you want to place that form on your website. To do this, first, choose a design for your form. You can add other fields if you have created them yourself, a piece of text, an image.
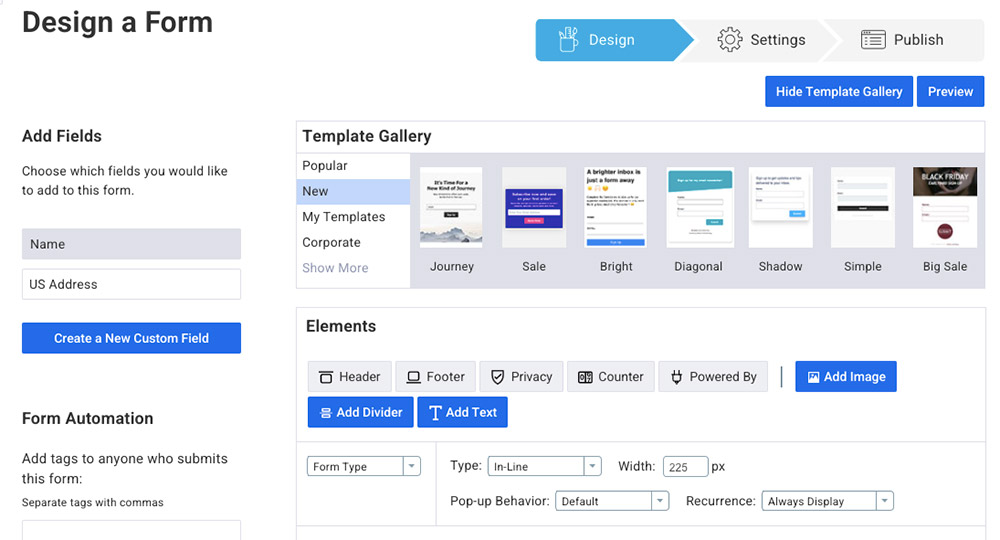
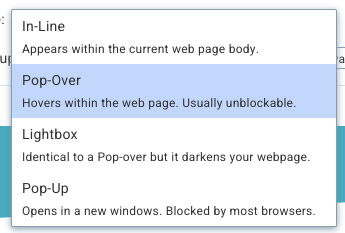
You can also change the type of form. By default, this is set to inline (the form can be placed between the text of your blog or in your footer). You can change this to pop-over, lightbox, or pop-up.
In the next step, you give the form a name, and you can also choose a thank you page. This can be a basic message, or you can choose your own URL.
If your form is okay, you can start publishing it. You can then install it yourself with HTML, or you can use the form as a landing page. In the first case, you get a Javascript snippet or raw HTML. In the second case, you can use the Aweber link that contains your form.
For example, if you use WordPress, you can install the plugin “Aweber for WordPress” to get the form on your site. You can then connect to Aweber and place the form with a widget on your website.
If you use the free version of Elementor, you can drag the Aweber Widget onto your page so that the form appears there. If you use Elementor Pro, you can use Elementor forms and link them to Aweber.
You can also add contacts to your list in other ways. This way, you can still get contacts on your Aweber list via other software. This is possible via Facebook, WordPress, Paypal, Squarespace, Wix, and Shopify. There is a step-by-step guide for each of these on Aweber’s site.
Segmentation
Under “subscribers,” you will see all your contacts that are registered on your list. You can then filter this. This can be done, for example, by country, who has already clicked, who has never opened an e-mail, on a certain tag, …
If you want to save this search query as a segmentation, you can do that with Aweber Pro.
List options
At list options, you can adjust the basic settings such as the name of your list and via which e-mail address mails should be sent. If you want more than one list, you can take a pro account.
You can also adjust the confirmation email (for double opt-in) that you receive after registration. Here you can change the language to English, Chinese, Danish, Dutch, French, German, Indonesian, Italian, Japanese, Korean, Malay, Polish, Portuguese, Russian, Slovenian, Spanish, Swedish. The subject line and the message in the e-mail are therefore in the chosen language. You can change the text if you want.
You can also turn off the confirmation email so that you have a single opt-in.
If you want to know more than just the name and e-mail address of your contact, you can create additional fields. This way, you can create up to 25 fields that you can use on your form afterward. This can be useful if people change their details, but I certainly wouldn’t show too many fields when registering. The more you ask, the faster people will drop out.
Landing pages
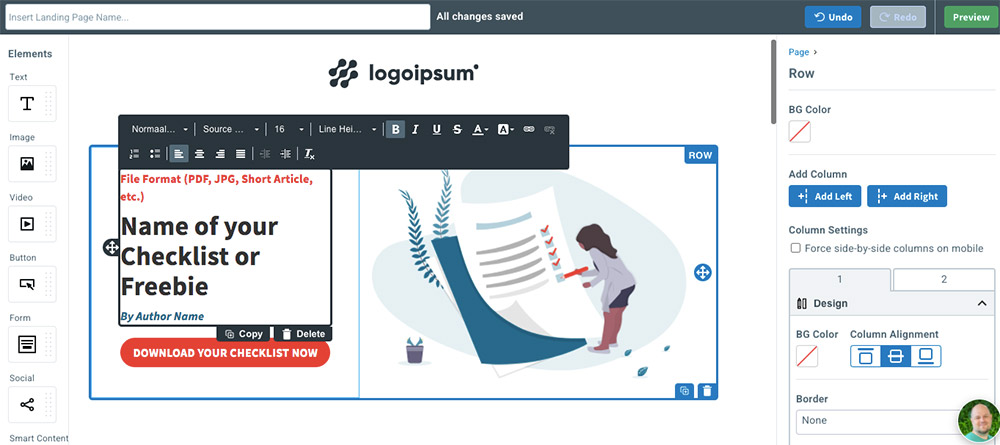
To create a landing page, first, choose a template or start with a blank canvas. Starting from a template can save you a lot of time. You can choose from: about/bio, blog/podcast, consultation, e-commerce, events/webinar, freebie, opt-in, thank you page, others.
You can adjust the texts and images but also add, remove or change elements via drag-and-drop. Elements to use on the page: text, image, video, buttons, forms, social media buttons, smart content, divider, popup, e-commerce, a row.
If you want to add ecommerce to a landing page, you must first make the connection with Stripe. With this you can sell an ebook, access a webinar, access your membership, access a course, make donations, …
As soon as you have made the connection with Stripe, you can add a product by clicking the buy button. Products to add: a monthly membership, annual membership or create a product yourself. You can choose between a one-time payment, subscription or payment plan. Once you have created your product, you can also start an automation.
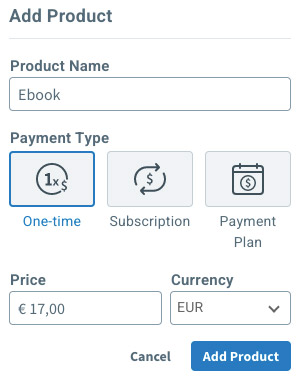
The software creates automatically a form for ordering in which people can enter their name and e-mail address. The thank you page (receipt) is also created or you can have your own page displayed by adding a url.
It is very convenient that you can receive credit card payments in this way. This is suitable if you work internationally where credit card payments are used by most people.
Web push notifications
Web push notifications make it easy for people to return to your website. They receive notifications in their browser of, for example, discounts, new blog posts or registrations for a webinar.

If you have set that up, they will see a popup if they want to receive web notifications. When they click on “Allow”, they will see this as soon as you send a notification. If the person who is registered for the notifications has his web browser open, this person will see these notifications on his desktop. He doesn’t have to be on your site for this.
If the person is not online when you send the notification, that’s okay. This is kept for 3 days, so if a person later opens the computer and browser, they will still see it.
I have tested this and the popup to indicate whether you want to receive notifications appears on the site. Unfortunately, a red cross remains in Aweber itself, so I can’t send a push notification since no one is added to the list.
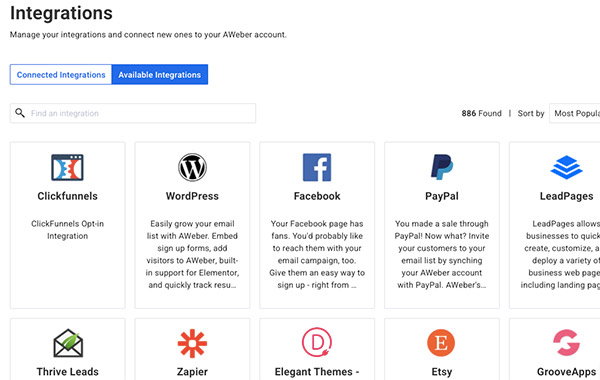
Integrations
You can connect Aweber with other software through integrations so that you can get even more out of your email marketing. Connections can be made with content management systems, CRM, e-commerce, landing pages, lead generation, membership, productivity tools, social media, surveys, video, webinar and other software.
Which integrations are possible?
123Formbuilder, 3dcart, 40nuggets, Agile CRM, Airbit, Amo CRM, Antavo, Beatstarts,, Better coupon box, Blogger, Bloom,, Bonjoro, Book cave, Bookfunnel, Booklaunch, Brave popup builder, Brizy, Campaign builder,Capsule CRM, Captain form, Carrd, Chatmatic, Clickbank, Clickfunnels, Clinchpad, CMNGSN, Connectio, ContactUs, Contest domination, Convertful, Convert player, Convertflow, Convertri, Coupon pop, Dasheroo, Dashnex pages, Digioh, Digistore24, Digital access pass, Digital product delivery, Dijest, Directpay, Divi,,, Easy digital download, Elementor, Elevatr, Etsy, Flatpack, Formcraft, Formget, Formstack, Foxycart, Genius lander, Gleam, Gotowebinar, Gravity forms, Growtheme, Hellobar, Heroic, Heyo, Instant ecom store, Instapage, Interact, Jetpack crm, Jotform, Justuno, JVZoo, Kajabi, KickoffLabs, Klickpages, Konnektive CRM, Landingcube, Landingi, Landingpage cat, Leadgrabb, Leadpages, Leadquizzes, Leadsbridge, Leadsflow pro, Listgoal, Liveagent, Manycontacts, Megapack, Mailmunch, Milotree, Moonclerk, Nanacast, Online sales pro, Onspot social, Opencart, Optimize press, Optimonk, Optin cat, Optingun, OptinMonster, Optin ninja, Orderdesk, Outgrow, Padiact, Pagewiz, Paydotcom,Paykickstart, Paypal, Podcast, Popup Domination, ProductDyno, Privy, Pushplanet, Quiz cat, Raven, Rafflecopter, Rewards fuel, Riddle, Satori,Sticky.io,, S2Member, Selz, Samcart, Sendowl, Shopify, Shortstack,Simvoly, Squarespace, Storenvy, Thesis, Thinkific, Thrivecart, Thriveleads, Tweetlead, Ultracart, Unbounce, Upscribe, Viralsweep, Warriorplus, Weblium, Weebly, Wheelio, Wishloop, Wishpond, Wix, Woobox, Woocommerce, WordPress, WPForms, WP ninja forms, WP subscribe pro, Zaxaa, Zipify oneclickupsell, Zipyfy pages, Zonpages, Zotabox
How does Aweber work?
You can start by creating a free account. To do this, enter your name and e-mail address. You do not have to enter payment details. You will then receive an email to confirm your email address.
Click on the button in the email and then you can set your password. When you are logged in afterwards, you get the choice which package you want to use: Aweber Pro or free. If you choose the Pro account, you must enter your credit card details.
Before you can start you need to fill in your website or other channel, your address details, how many contacts you already have, what your goals are and what other tools you use.
Then you are in the admin area. You can activate a standard created welcome automation. As soon as someone subscribes to your list, that person will receive the welcome email. Tooltips explain how this works and what you need to adjust.
You create a registration form that you place on your website or on a landing page of Aweber. As soon as people have registered you can start sending an e-mail. You’ll find this in the menu under broadcasts.
Of course also not unimportant; how much does Aweber cost?
Price Aweber
Free version
The good news is that there is a free version of Aweber. You can use it permanently for free until you have 500 people registered on your email list.
With this free version you do have limitations. In addition to the number of people on your list, there is also a limit to the number of emails you can send. You can send a maximum of 3000 e-mails per month. If you have 300 people on your mailing list, you can send 10 emails per month. That is more than enough for most people.
You can do most of it with this free version, but there are some things you can’t do with it. For example, you can’t do split testing, don’t do behavioral automation, cart abandonment, more advanced segmentation, advanced analytics, web page tracking and sales. In addition, the Aweber branding will be mentioned in your emails and on the landing pages.
With the free version you can only create one list. That will be a reason for most to upgrade to the Pro version. It is useful to have a separate list for different products or options.
Aweber Pro
In addition to the free version, there is only one package that gives you access to everything. Not many other packages where you can do just that little bit more. The only thing you pay more for is as the number of subscribers on your list grows.
You can pay monthly, quarterly or annually. If you opt for annual payment, you save 19.2% compared to a monthly payment.
With the Pro version you can have an unlimited number of people on your list and you can send unlimited emails. In addition, you can also do split testing, behavioral automation, cart abandonment (if someone abandons their shopping cart), more advanced segmentation, advanced analytics, web page tracking and sales. The Aweber branding will also be removed in your emails and on the landing pages.
Conclusion Aweber Review
Aweber is a good e-mail marketing system with which you can do a lot. Although it is not difficult to work with, I still find Mailerlite a bit more intuitive and therefore more user-friendly. Moreover, it is also a bit more modern in design.
However, if you would like push notifications integrated with your e-mail system, you can use Aweber for this. I have not come across this function with any other e-mail system. You also can receive payments.